Well, I guess the title pretty much told the whole story! Right to the point, yes?
I decided to trim up a few tea towels while waiting for the clothes dryer to wrap up a cycle and it was like a spurt of creative energy coursed through my lagging psyche! No plan, just do something.
So I had this little pack of 2 inch pre-cut squares in one of my favorite fabric lines, Richmond Reds. The best part of this was the price, $2.00 in a bargain room at my favorite quilt shop. Can't beat that, right? The towels were in the stash.
I laid out the little squares, sewed them together with the standard 1/4 inch seam in a chain long enough to cover the width of the towel and a half inch + a hair for turning on each end.
I pressed under the top and bottom raw edge, again 1/4 inch and just stitched them down 4 inches from the already finished hem on the towel. Toss in another load of laundry and pull out another towel. This experiment is going well, I need to work up some samples for my Holiday baskets anyway.
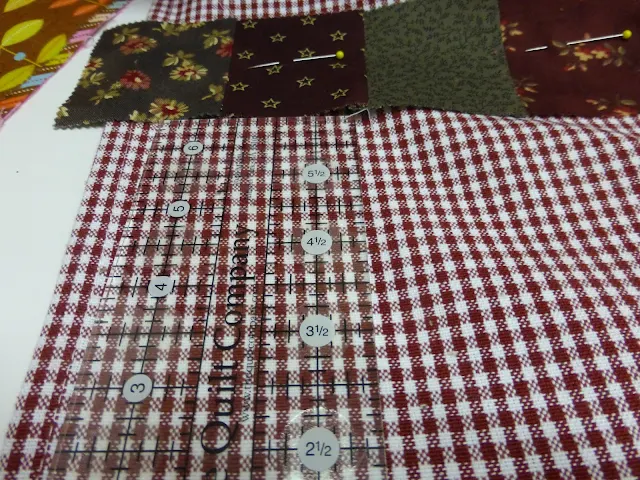
So here we go with a little mini-check patterned towel and more of the same squares from that little candy pack. Sew them all together.
Find a nice little contrast piece from a paisley Honey Bun by Kansas Troubles.
The Honey Bun strip is the width of fabric so I cut it in half and it fit the width of the towel perfectly. I pressed up one long side on each strip 1/4 inch.
Measure up 6 inches from the finished bottom hem of the towel. Pin the sewn blocks to the towel. I have learned I must pin when doing these things, The strip will shift.
Stitch the block strip to the towel, do not turn under the raw edge, again a shy 1/4 inch from the edge of the block strip.
Next pin the raw edge of the strip to the raw edge of the sewn block edges, secure with stitching 1/4 inch from the edge. Press and turn.
Pin into position, stitch top and bottom close to the edge of the trim strip. I stitch about 4 threads from the edge. On this one I changed to a more matching tan rayon thread. I just turned the edges of the trim strips under 1/4 inch and turned them again, stitched them down with some back stitching top and bottom. I forgot to take a pic of that, sorry.
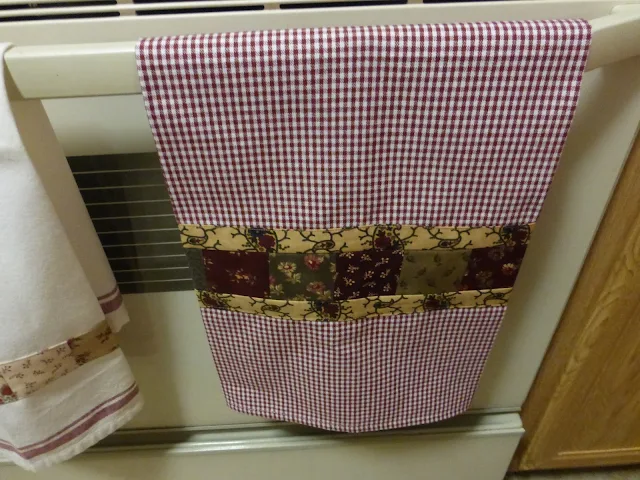
Ta-Da!
And Ta-Da! And.... the laundry is done too!!!!
A by the way comment: many times quilters discuss on forums, in class rooms etc, do you wash your pre-cuts? Many opinions but this is what I do. I have a super-duper high steam iron. I lay the pre-cut on top of a piece of plain white muslin and I press and steam each piece. This tells me two things. Number 1-is the fabric a bleeder? If it is, it has to go, simple as that. And Number 2, is there shrinkage? I expect a little but the steam pretty much takes care of that with the first pass. That's about it. Now I must add that I like to use a bit of Best Press or Spray Starch on some of these pieces depending on how they are going to be cut. If I am doing any bias cutting, I starch. It works for me, I am not an expert in any way. Just so you know.
 |
| The last of the tomatoes. |
So I had this little pack of 2 inch pre-cut squares in one of my favorite fabric lines, Richmond Reds. The best part of this was the price, $2.00 in a bargain room at my favorite quilt shop. Can't beat that, right? The towels were in the stash.
I laid out the little squares, sewed them together with the standard 1/4 inch seam in a chain long enough to cover the width of the towel and a half inch + a hair for turning on each end.
I pressed under the top and bottom raw edge, again 1/4 inch and just stitched them down 4 inches from the already finished hem on the towel. Toss in another load of laundry and pull out another towel. This experiment is going well, I need to work up some samples for my Holiday baskets anyway.
So here we go with a little mini-check patterned towel and more of the same squares from that little candy pack. Sew them all together.
Find a nice little contrast piece from a paisley Honey Bun by Kansas Troubles.
The Honey Bun strip is the width of fabric so I cut it in half and it fit the width of the towel perfectly. I pressed up one long side on each strip 1/4 inch.
Measure up 6 inches from the finished bottom hem of the towel. Pin the sewn blocks to the towel. I have learned I must pin when doing these things, The strip will shift.
Stitch the block strip to the towel, do not turn under the raw edge, again a shy 1/4 inch from the edge of the block strip.
Next pin the raw edge of the strip to the raw edge of the sewn block edges, secure with stitching 1/4 inch from the edge. Press and turn.
Pin into position, stitch top and bottom close to the edge of the trim strip. I stitch about 4 threads from the edge. On this one I changed to a more matching tan rayon thread. I just turned the edges of the trim strips under 1/4 inch and turned them again, stitched them down with some back stitching top and bottom. I forgot to take a pic of that, sorry.
Ta-Da!
And Ta-Da! And.... the laundry is done too!!!!
A by the way comment: many times quilters discuss on forums, in class rooms etc, do you wash your pre-cuts? Many opinions but this is what I do. I have a super-duper high steam iron. I lay the pre-cut on top of a piece of plain white muslin and I press and steam each piece. This tells me two things. Number 1-is the fabric a bleeder? If it is, it has to go, simple as that. And Number 2, is there shrinkage? I expect a little but the steam pretty much takes care of that with the first pass. That's about it. Now I must add that I like to use a bit of Best Press or Spray Starch on some of these pieces depending on how they are going to be cut. If I am doing any bias cutting, I starch. It works for me, I am not an expert in any way. Just so you know.


Comments