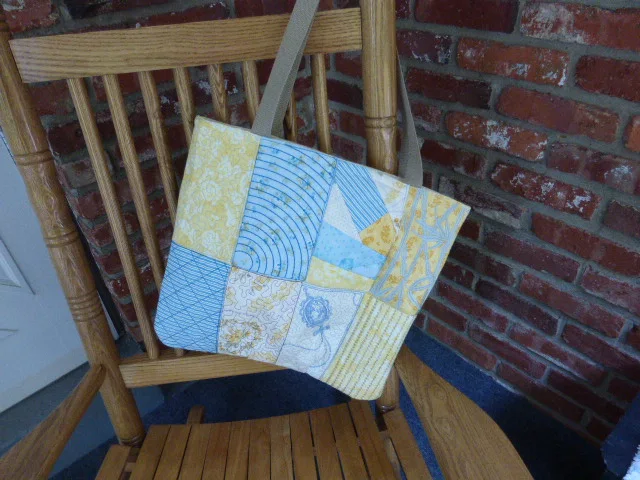
I took a class a couple weeks ago that taught us how to use a quilt in the hoop method. The designs are Anita Goodesigns which starts with hooping a stabilizer, the machine then stitches a placement line for batting, it secures the batting and then you lay the fabric in the hoop and the machine stitches another placement line for the fabric and then it stitches the design outline. The designs are then embroidered and quilted in the hoop. This sounds like a lot of steps compared to the machine embroidery method of old but once you get used to the layering technique and Not hooping the fabric it is very efficient. This tote bag has 16 little panels (about 4 x 8 inches finished) that are then sewn together to create the bag. I used a cut away stabilizer that I actually left in the panels after trimming the edges off. That actually gives the bag great stability and does not add extra weight.
The bag is lined with a little strip of pockets on the inside. I chose to use a cotton webbing handle instead of making traditional handles out of fabric and batting. I bought the webbing at an Amish Quilt Warehouse in Berlin, Ohio.
The bag has two little tucks on the front and back on the bottom for shaping and the corners are rounded to add some character. Side A even has a crazy patch block. Would you believe that I forgot to do some decorative stitching on that one? Laser focused I am, laser focused!!!
 |
| All the patterns are embroidered on top of the fabric. It's hard to see but the third block on the bottom here is a cameo. I top stitched the top of the bag 1/2 inch from the edge and on the edge to stabilize the top and secure the lining. |
 |
| This is my favorite side, the antique keys and butterflies and the stipples all are embroidered. |
 |
| the inside of the bag, before lining with the stabilizer showing |
 |
| the rounded corners |
 |
| This is the webbing I used for handles, I cut them 28 inches in length, stitching took away 1 inch. This left the length comfortable for a shoulder bag and not too long for a hand held bag. |
 |
| Have you tried these yet? I have pins and clips etc. so I decided I didn't need these. Then I went to a quilt shop and felt like I needed to buy something so I did. They are wonderful! I used them to secure all those layers in the bag, including the webbed handles and all the fabric, batting and interfacing layers, they were perfect. Why did I wait so long? They are a little pricey, 10 for $7.00 at this store but I will pick up some more. Very secure hold and they hold really think layers as well. |
- I haven't made many bags, in fact, I think this is only the third or fourth one. With each one I learn something.
- I had seen several totes and purses in the shop using this quilt-in-the-hoop method. They were so nice, so professional looking. I may try to make another one.
- I need to get a can of Scotch Guard. The light colored fabrics will soil easily.
- I think I will try to do some of the panels in a larger format if I can figure out how to make the machine do that. Geez, always something.
- I'm loving the Wonder Clips, gadgets and widgets, that is me to a T!
- My sew-all-day day was really a sew half the day day. Long story. But at least I did get this project finished and believe it or not started another Jelly Roll quilt.
- I need to make a few of them up ahead of time to have them available for gifting when I need them, not have to rush like the Mad Stitcher at the last minute.


Comments